
I would classify this tutorial as INTERMEDIATE LEVEL, which assumes you have a basic knowledge of PI
and its tools.
You select the graphics that you wish to use, or you may get the image that I used here. If the graphic that you use is a single non-merged graphic, then you will need to hit the Ctrl + D key to duplicate the graphic. Minimize one of the images in your PI. Then with the second one merge it (right click and select Merge All), so you will be able to work on it. The reason you want to merge it is so you can use the Lasso tool on it. The lasso tool wont work on an active image.
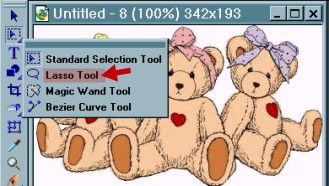 |
Go to
Standard Selection tool and select Lasso
Tool. Decide which
part of your graphic that you want to
animate. |
 |
Take your lasso tool and draw around the first head, including the ribbon. To make it easier, you can use the zoom tool to make your image larger. |
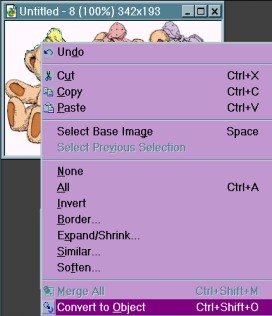 |
After using your lasso tool to draw
around the head, right click and go to Convert to
Object. |
 |
Now you
should have 2 heads, one merged and one active, like the screenshot on the
left. Do this to
all the heads. Now move all
heads to a new canvas. |
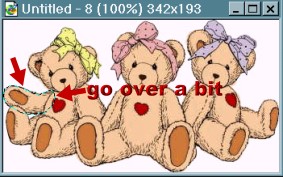 |
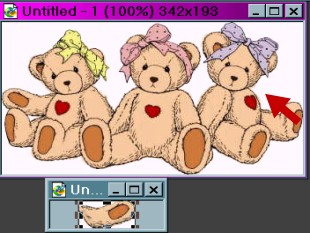
Ok now do the same for the left arm. (We will use the left arm for both left and right animated arms). Note: go over a little of the foot and chest (see screenshot to the left). |
 |
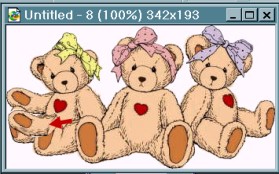
Again right
click and Convert to Object. Move the
arm off onto it's own
canvas. Note: if you wish to resize the bears at this time, just take all the parts and put them with the image of the bears. Right click, click on select all objects, then right click, select group. Now you can go to Transform tool and resize the objects together. By doing this,they will all have the same proportions. |
 |
Ok now go to tool panel and choose smudge tool, or blur, or even go to paint tool. Make necessary repairs to your arm, to make it look like an entire arm (without the lines from the bear's belly and legs). |
  |
Like this
picture shows, the new arm looks like one whole arm, with out the lines
that were in it before (see screenshot above for the arm with
lines). |
 |
Okay, here is what you should have on your workspace. |
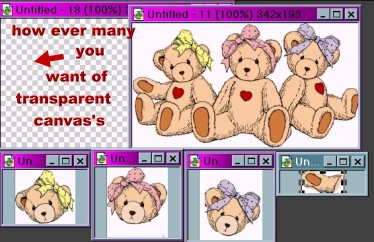 |
Create a new transparent canvas for your bears. Add your bears to this transparent canvas and center them on the canvas. Hit Ctrl + D on your keyboard, and duplicate this canvas at least 6 to 8 times. Depending on how many frames you want for your animation. This will
give you the different frames you will need to make your animation
work. Remember the number of moves
(frames) will also decide the size (kb) of the finished
product. |
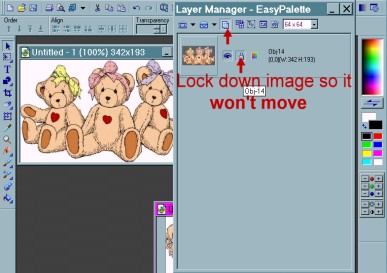 |
Use your
Layer Manager to lock your image in each frame, so as not to let it be
moved (click the little lock in the layer manager to lock the
image). You want every frame to be exactly the same except for the
movements you wish it to
make. |
 |
OK here I have used 6 canvases.
Save one canvas as frame
1.gif. ((Save each canvas as Gif format as you make them for use in
the animation program. Do not delete them out of PI. You might want
to come back and make some changes to that particular
frame.)) |
 |
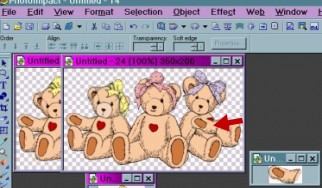
For your 2nd
frame, choose another canvas and make the bears
active. Erase the head of one or 2 of the bears, like this
image shows. |
 |
Now go get the head, or heads that you wish to use and transfer them to the canvas. ((Note: Just duplicate the heads and keep the originals on their own canvas.)) |
 |
Now use your Transform tool to make head move from original angle. Give each head a different angle. Or you can use the rotate flip, Horizontally. Save this as frame 2. gif. |
 |
Now go to the Path Drawing Tool and choose the round shape. Use the eyedropper to get a color to match the fur on the bear's head. Make a round shape to cover up how ever many eyes as you wish. Save this as frame 3.gif. Continue changing each canvas and saving each as a new frame in gif format. Do the same thing with the arms as you did with
the heads. Raise or lower the arms, open and close eyes,
turn heads, and so on. Make each canvas different in some way. |
 |
OK we want to
add an arm here where there is none. So take the arm you did earlier,
duplicate, and bring it to this
side. |
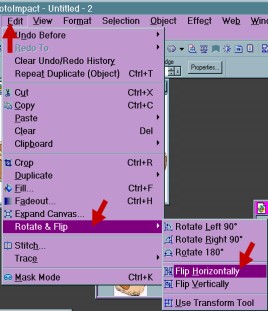 |
Now go to
Edit, Rotate & Flip,
Horizontally. |
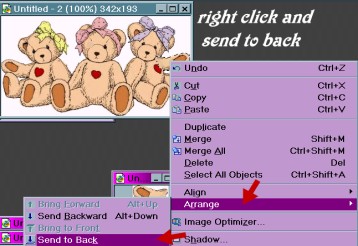 |
Now right
click and choose arrange/send to back to
put the arm in back of the
image. |
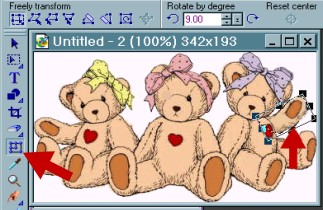 |
Now use the
transform tool to make the arm move. Also erase
the arm on the left side of your image so you can make it move
also. |
If you have
done this now you can animate anything.
You can take almost any image apart, and animate it or make your own
little teddies to animate. The more you
play with the animation movements the more you will see how much fun animation
can be.
I hope you have enjoyed this tutorial. Please let me know if there is anything I can do to help you or to improve this tut.